Red Velvet CupCake

Christmas is a week ahead,I found a lot recipes being posted welcoming the Christmas charm,so i would like to participate in this joy along with my beloved readers,so this post is a small part from my side to treat my readers.Christmas is a season of joy,where some people enjoy the low temperature,playing with the snowballs,kids sing "Jingle Bells"... which is been taught to them at school,and these kiddo's will be excited to receive their gifts from Santa.I remember my schooldays where we play chrisma and chrischild a fun game,when the Christmas is nearing.All over the world ,people enjoy Christmas celebrations and welcome the forthcoming  NewYear.


      There are a lot of recipes prepared in prior for celebrating Christmas,like cookies,cakes ,especially classic plum cake,meringues,yule logs and a lot more,today i decided to make a colorful cupcake which has red in its name.Because of the general christmas theme goes with red usually, i decided to choose a recipe that dominates red in color,So by default i chose this Red Velvet Cupcake,this was one of the recipe which i was longing to bake for a longtime,since the name velvet reflects something special about this recipe.So wanna try out this brightful recipe and to experience how this cake is different from others i decided to proceed.Let's get into the baking mood now,please join me :) .
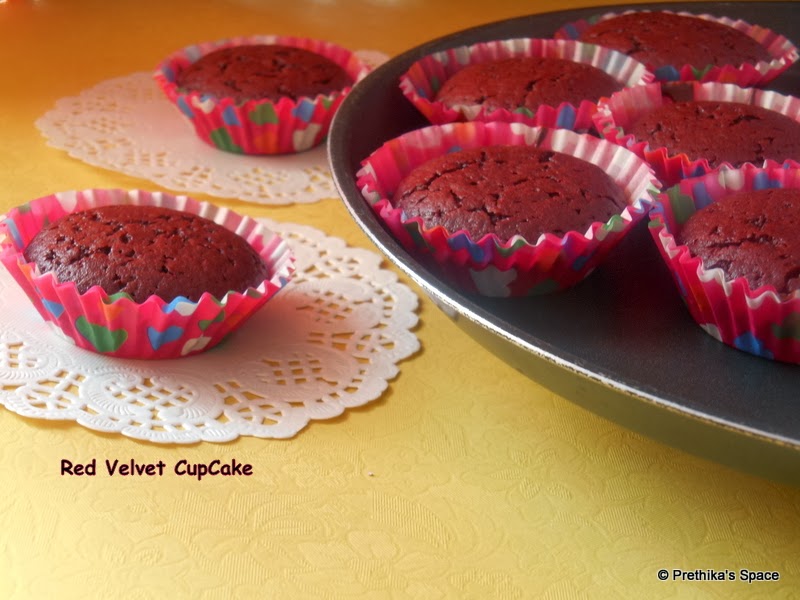


Red Velvet Cupcake

Check the below link for the original measurements i have halved the measurements
Recipe Source:JoyOfBaking 
 
Yields-10 small Cupcakes

Ingredients-My Red Velvet Cupcake Measurement.

All Purpose Flour-70g
Baking Powder -1/8tsp or a dash
Salt- a pinch
Unsweetend Cocoa powder - 1/2 Tbsp or 5g
Refined oil- 2 Tbsp or 1/8 Cup
Powdered Sugar-6Tbsp or 1/3 Cup(Can increase or decrease according to your taste)
Egg - half (from a single egg) approx(25g)
Vanilla Essence - 1/4 tsp
Buttermilk - 60g(From 50 g buttermilk with 10g water beaten well)
Red Food Color- 1/2 Tbsp
Vinegar -1/4 tsp
Baking Soda - 1/4 tsp

I have replaced butter with refined oil you can add butter if you wish.


Method

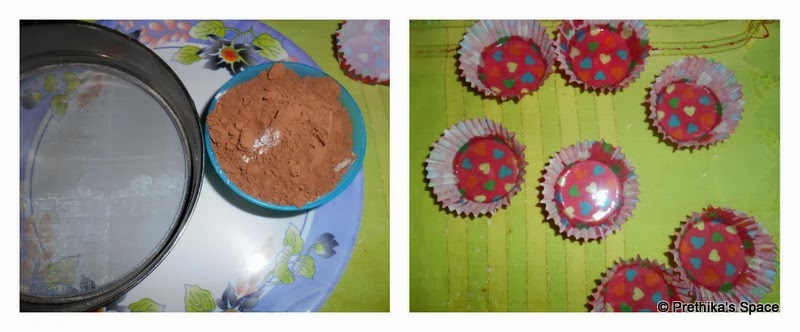
  • Sift the all purpose flour along with salt,cocoa powder and baking powder and keep aside.Meanwhile grease the cupcake liners. Preheat oven to 200 c.
  •  Add red food color to the buttermilk and mix well.
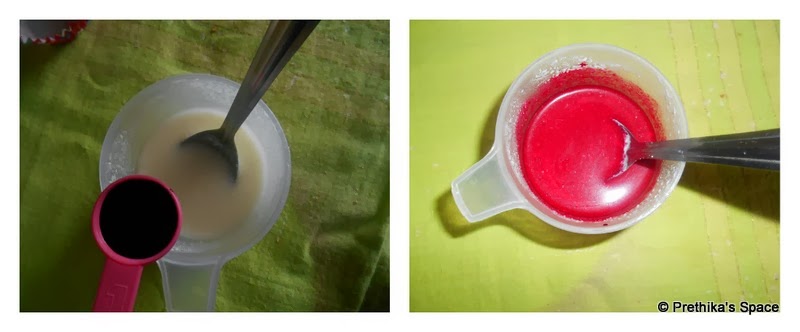
  •  In a separate bowl keep the sifted flour aside.In another bowl beat butter and sugar together,in my recipe i have used refined oil instead of butter,then add vanilla essence and give a mix.To that bowl add the egg and beat them well to a smooth texture.Pour the beaten oil/butter sugar mix to the sifted flour and mix well in one direction.Add the buttermilk mixture to the bowl as seen in the second pic below.Mix well and check the consistency of the batter.

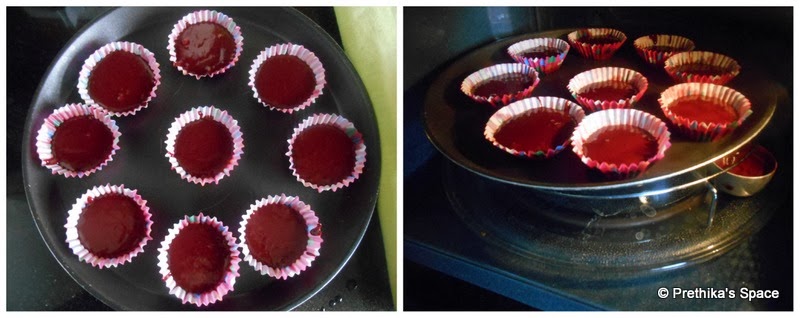
  •  In a small bowl add baking soda and vinegar and give a mix.Immediately pour them to the prepared batter and mix well.Immediately pour the batter to the greased cupcake liners.

  •  Place the cupcake's into the oven and bake for 12-15min under 200c.

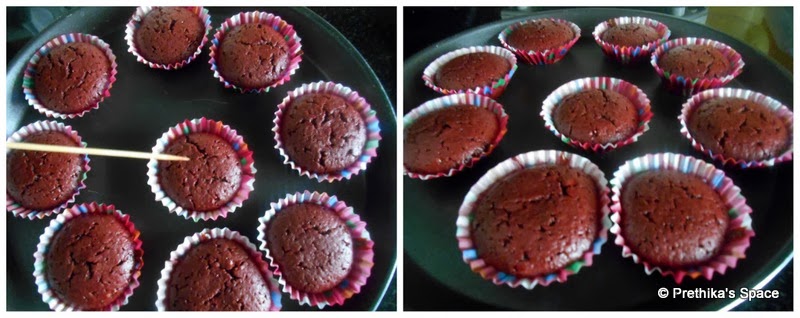
  • Check whether the cupcakes are ready by inserting a skewer/wooden tooth pick to the baked cupcake ,it should come out clean.Else bake for 2-3 min more.

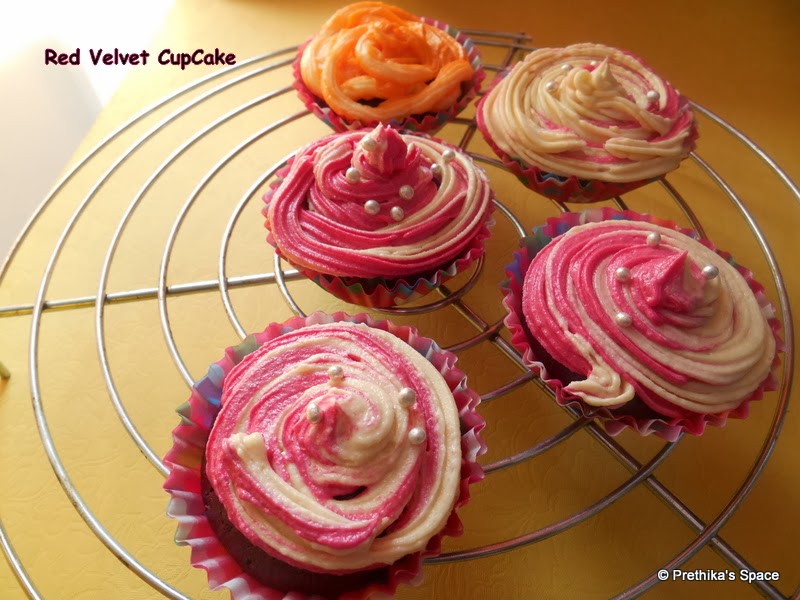
I have done butter-cream frosting to the cupcakes,to give the celebration look.


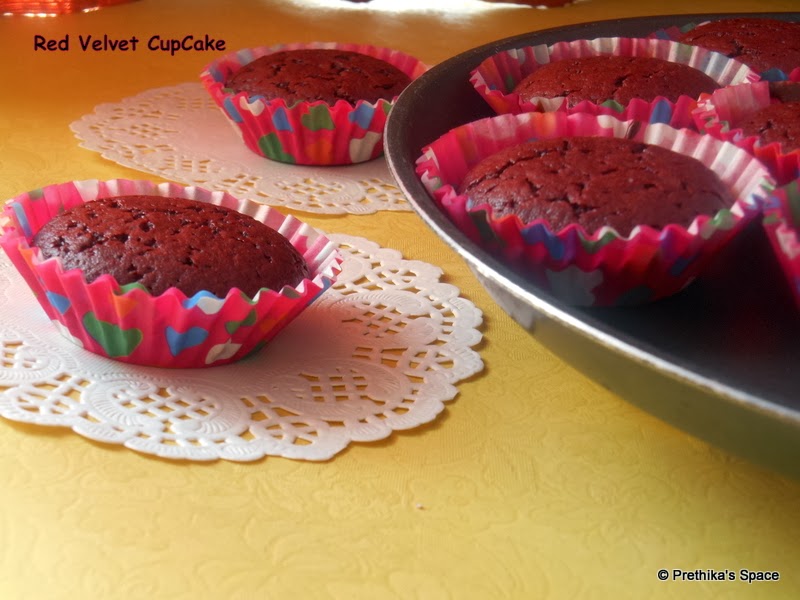
 My Final Red Velvet Cupcake with butter-cream frosting.


Read More..

Saffron Kesari

Hi Friends,my today's post is going to be a special celebration post.A birthday celebration post for my dear friend Subha,who is a food blogger too.Subha and me share a 15 yrs of friendship,so she is my long-time friend.For my dear and long-time friend i decided, to dedicate a special post for her.Since she's also a co-blogger this oppurtunity to post for her happened easily.Happy Birthday Subha.. Hope she will be happy for my post..


Coming to our post,let it be a kesari or payasam we people generally make it only for special occasion's like festival's or on birthday,anniversary day's.So while doing kesari for special person's i decided to give a special touch to it,why don't we add saffron's to them to make it rich and give a special appeal to our dear one's.Even saffron's give the kesar color to the sweet ,which is a natural way of coloring the dessert.The kesari which i've made here is a general kesari which we make at anybody's home,but the special ingredient saffron make's my dessert to name as Saffron Kesari,that's it.Still, you can follow the same recipe for making your ordinary kesari's,only by excluding the saffron's i've added in the recipe.And ypu can give any yellow or red food colors for coloring the sweet.Let's look at the recipe below.


Ingredients

Roasted Rava - 1 Cup
Water - 2.5Cup
Sugar - 1 Cup
Ghee - 1 Tbsp
Roasted Cashews- few
Crushed Elaichi - 2

For Saffron Mix

Saffron strands - 4 to 5 
Milk - 4 Tbsp
Yellow Food Color- a pinch (optional)

For Roasting Rava

Ghee - 1 - 2 Tbsp


Method


  • Measure your roasted rava.If not using roasted one's,heat a spoonful of ghee in a pan and add the rava till golden color.You can add upto 2 Tbsp of ghee for a single cup of rava. Transfer the rava once done. Soak the saffron strands in warm milk for about half an hour,if the saffron color is not enough you can add extra food color.In a pan add the cashews roast them with a little bit of ghee and place them separately. Crush the elaichi using a stone mortar or just give a pulse in run in your mixer.

  • Add crushed elaichi to the same pan,where the cashews are roasted, and saute for 10 sec's then add the water.Let them boil.

  • Add the roated rava to the boiling water and keep on stir with the other hand.Mix then well wait until they are well cooked.Once cooked add the saffron-milk solution and give a mix again.Ensure that the color is evenly spread.

  • Then add the sugar and give a mix again and stir for 3 to 4 minutes in medium flame.Switch off the flame and finally add the roasted cashews and ghee and mix well.
  • It's ready to serve


Read More..

Inji/Ginger Chutney

Inji or Ginger is a wonderful root ,that has a lot of medicinal values.May it be an indigestion problem or a sore throat we use ginger to overcome the problems.In Indian cuisine we generally use lot of ginger ,which helps in digesting the food we eat,while preparing non-veg menu's.Not only in food's,also in tea/chai we use crushed ginger and boil along with tea leaves ,having this ginger tea will soothe your stomach and increases the digestive power.Not only these above facts,it increases blood flow,it's a good anti-inflammatory agent and also has a lot of anti bacterial benefits.So knowing these facts our ancestors used ginger in almost all the dishes they prepare which helped them in lot of ways.Knowing these benefits  might inspire you to include ginger in all possible ways in your food.So why not a chutney variety?Instead of having the regular coconut,coriander and tomato chutney's we will see an interesting ginger chutney.


This ginger chutney is so simple to make ,there is no coconut added to it and you store them in your refrigerators for a week.Include this ginger chutney when you make Adai/lentil dosa.Ada dosa has lentils ,and lentils only in it ,which requires a lot of time to digest having this chutney to accompany them might make the digestive process faster.


Ingredients

Ginger - 100gms
Red Chilly - 3 to 4
Urad dall - 2 tsp
Tamarind - quarter the lemon size
Jaggery - 1tsp (Can increase also)
Salt - As reqd

To Temper

Oil - 1tsp
Mustard seeds - 1/4 tsp

Method


  • Peel the skin of the ginger and slice them .Break the red chilly and de-seed them.In a pan add some oil and fry the ginger,separately for about 3 to 4 minutes in medium flame.Remove the fried ginger from stove and fry the red chillies and urad dall and tamarind.Saute the red chilly separately remove from fire then saute the dall and tamarind.Allow them to cool.


  • Once cooled grind them in mixer without adding water first and then add water later and again grind to a smooth consistency,finally add the jaggery and give one more run in your mixer.Temper them with gingely oil and serve.


  • Enjoy for your Adai dosa.


Tip


  • This is a spicy and hot chutney,you can increase the amount of jaggery if the chutney is more spicy.
  • Add gingely oil to temper.it gives an extra flavor.
Read More..

Gobi Paratha

Got bored of eating and preparing your regular tiffins,then this is the recipe which you need to try out for a change to get out from regular course.The recipe i have posted here belongs to paratha variety,where we are going to stuff some interesting thing inside the paratha's.Cauliflower's are everybody's favorite and most probably everyone loves it,whether its going to be a gobi fry or a gobi manchurian.(In North part of India we call cauliflower as Gobi.).So why not a gobi paratha? So, i have given my favorite gobi paratha.Friends,its interesting to make a gobi paratha.Only preparing the stuff makes a bit of time,but the remaining parts in this process sounds more interesting.Hope you will enjoy this Gobi Paratha.


This paratha's are availble in almost all places apart from south india.But, nowadays i can find out some restaurants serving Gobi paratha's in southern part of india's,i mean the south of southern india.These are spicy stuffed paratha's were we need not prepare any special curries to accompany.Just a dahi dip or a pickle/achaar might entertain you.I agree this is a lengthy process,but you can prepare this stuff in advance and store in your refrigerator the day before preparing gobi paratha.So that you might not feel the lengthy duration.Just only 2 paratha's are enough for a single person ,it's such filling and spicy dish.


Ingredients

For the stuff

Cauliflower/Gobi-one medium sized 
Onion -1 no (Finely chopped)
Green chilly- 1 no
Jeera - 1/2 tsp
Ginger Garlic paste -  2 tsp
Garam masala - 1/2 tsp
Red Chilly Powder - 1 tsp
Coriander Powder - 3 tsp 
Turmeric Powder - 1/2 tsp
Salt - as reqd
Oil - 1 tsp
Coriander Leaves - few
Curry Leaves - few


For the Dough

Atta flour- 3 Cup
Water ,Salt -As reqd


Method


  • Grate the cauliflower.Just grate the flower portion only,no need to grate the stem section.In a vessel add required water ,add turmeric powder ,salt and allow to boil then add the grated gobi and wait until it boils.It might take 10 minutes.Switch off the flame.


  •  Pass the boiled gobi through  a sieve and allow to cool.In a pan add the oil and splatter with jeera seeds.Then add the chopped onion and green chillies.(Finley slice the green chilly)


  •  Then add the curry leaves and ginger garlic paste.Saute them for a while,until the raw smell of ginger garlic paste goes off.Then add the garam masala,coriander and chilli powder and salt.Saute them for a while.Then add the cooled gobi and mix well.


  •  Cook the gobi along with the masala ,atleast for 3-4 minutes,by this way the smell of gobi gets rid off and the masala will get combined well with the gobi.Finally add the chopped coriander leaves and saute them again and switch off the flame.Allow the gobi masala to cool down.


  •  Meanwhile prepare the dough by mixing the atta flour with salt and required amount of water.Make the dough to a pliable consistency apply some oil over the dough and keep the dough aside for atleast an hour.Once the gobi stuff is ready and cooled down make them into small balls.Also pinch a part of the dough and make balls out of the dough.Make sure the gobi balls and dough balls should be same in size.Take a dough ball ,also keep ready some atta flour in a bowl for making the paratha's.Dust the dough balls with the atta flour ,and spread them with your fingers rotating the dough ball so that the dough will spread the shape of a puri,or instead you can also spread the dough balls with the help of the rolling pin.Place the gobi ball in the centre.


  • Try to cover the gobi ball with the dough,if the dough is pliable it will be easy to cover the gobi ball.Roll the gobi stuffed ball with your palms gently and again dust the ball in the atta flour.Take the dusted ball and again gently press the ball in between your palms ,don't do it harshly.Dust the working platform and place the pressed dough.


  • With the help of a rolling pin gently spread the dough to a paratha shape.You have to do it really gently.Don't run the rolling pin fast ,do it mildly and slowly .Apply the atta flour,dust them, if needed to reach the paratha size.In an iron skillet spread oil and place the gobi paratha.

  • Don't turn the paratha immediately,wait until one side is cooked,apply some oil on top of the paratha. Turn the paratha and let it cook.Once done remove from the tawa.


  • Serve the hot gobi paratha's with dahi dip and pickle.


Read More..

Muttai Kuzhambu / Egg Curry

Hi Friends,how are you?Hope you are doing good!!! I know its been a long time to post a new recipe at this page.Sorry viewers for this delay,from now onwards i will make sure to post recipes regularly.So,am back to full form now to make my viewers happy am going to post one of my best and favorite recipe,Muttai Kuzhambu.It can also be said as Egg curry .It's served along with rice.Its so simple to make and by the way you needn't worry about making a side dish for this recipe.The egg can be served as a side dish, or you can simply go with pappads too. 
If you are bored or tired of making curries and a suitable side dish for them ,better you can opt this gravy.It indeed saves your time and also i guarantee you will love your simple meal too..Lets begin our recipe 


It's so interesting to make this gravy and that too the final part of making this gravy is so exicting.I wish you all to have an exicting curry for your meal.


IngredientsServes 2

Boiled Eggs- 2 no
Unboiled Egg - 2 
Small Onion - 2 Tbsp (Chopped)
Tomato - 1 (Chopped)
Sambar/Kuzhambu Powder - 2 tsp
Turmeric powder - 1/4 tsp
Tamarind - half the size of a regular gooseberry
Rock Salt - As Required
Water - As Required

To Grind

Grated Coconut - 2 Tbsp
Jeera - 1/2 tsp
Roasted Gram - 1 tsp
Water - As Required

To Temper

Oil- 1 tsp
Mustard seeds - 1/2 tsp
Curry Leaves - few
Coriander Leaves - few


Method


  • In a mixer grind the coconut,jeera along with roasted gram by adding little water.Grind them to a fine paste.Meanwhile boil and peel the eggs.You can make deep pricks using a fork on the peeled eggs.Also soak the tamarind and extract the juice.Keep these ingredients aside.In a pan add some oil.


  •  Then add the chopped onions saute them for a while until they are cooked.Then add the chopped tomatoes and cook for a while.When the tomatoes are cooked add the coconut paste ,sambar powder,turmeric powder and rock salt.Saute them.


  • Add the tamarind extract and add 1.5 Cup water initally.Add the boiled eggs to the gravy let them boil.


  • Once they reached to a water gravy consistency.Break the raw eggs and add to the boiling gravy,gently spread the egg whites around the gravy ,while adding the yolk dont break the yolk's.add the whole yolk's.Keep the gas in Sim,let them boil for 3 minutes under low flame.close the gravy with a lid and let them boil .turn off the heat.Finally temper them and its ready to be served now.


Enjoy ....


Tip


  • Dont break the egg yolks while adding to the gravy,if it got broken the whole gravy will smell bad.
  • Before adding the raw eggs ,ensure that the gravy is not thick.because after adding the raw eggs the gravy becomes thick.If the gravy is thick before adding raw ones kindly add some water and then proceed.
Read More..

Chocolate Marble Asian Bread(Roux Method)

Chocolate marble asian bread is my  post for HBC challenge.This breads - HBC challenge, was hosted by Manjula of DesiFiesta, where she presented four varied types of bread,among those i chose this marble bread,impressed with its picture.Yeh i got attracted with its choclaty layer's ,but later got some confusions of how to start this method and whether can i complete this on seeing the lenghty procedure and also got scared because of the water roux or tangzhong method.This term was completely new to me.But later i felt its such an easy and interesting method to play with baking breads.


Water roux or,Tangzhong method was developed by the chinese,even though they seem to be originated from Japan.This method starts by mixing the bread flour with water and making them to a paste form.Unlike our ordinary method of baking breads ,we simply mix yeast to lukewarm water and then proceed to baking.Here we make a paste of water with bread flour and head to the next process.I have done few breads using yeast in luke warm water,but after tasting this bread i personally felt water roux breads stay soft and spongy compares to the normal breads.Also the choclaty flavour in this bread gives an yumm bite to have with.This bread was a hit at my home,Thank you Manjula for this wonderful opportunity. 


Ingredients


Water Roux Method

1/3 cup bread flour
1 cup water


Main Dough

2 ½ cups bread flour
2 tablespoons sugar
½ teaspoon salt
3 tablespoons milk powder
100 ml of water plus 2 tablespoons water
1 ½ tablespoons unsweetened cocoa powder
1 ½ teaspoons yeast
2 tablespoons butter


Method

Water roux:

In a small pan, mix all the ingredients of water roux.Ensure no lumps are there before proceeding to heating.In your stove top place this mix and constantly stir ,until they form a paste. Dont over cook.Keep the flame in Low.Remove from flame and let them cool.Cover them with a Cling film or with a wet cloth.


Main Dough

  • Take the yeast and add 2 tablespoon of lukewarm water and let them proof.Leave the yeast aside for atleast 10 minutes.In a bowl add all the ingredients under main dough except water(100gm),coco powder and butter.To them add the cooled water roux and yeast mixture and  mix them.


  • Knead well .Then add butter and knead again to make a soft dough.Divide the dough in approx 2/3 and 1/3 parts.Cover the smaller portion of the dough and knead the bigger portion of the dough to make them soft and cover them with a cling flim or with a wet cloth.


  • Take out the smaller dough and add the coco powder and water and knead again to make them a soft dough.Once done,cover both the dough's with a cling flim or wet cloth and let them double its volume.Leave it aside for 40-50 minutes.


  • Once they appear double its volume ,remove the cling flim and work on the dough.In a flour dusted platform roll out the chocolate dough into a rectangle shape of approximately 6 x 9 inches and the white dough to 12 x 6 inches.


  • Layer the chocolate rectangle in between the white rectangle. Flatten the rectangle and cut in 2 equal portions. Layer one piece on top of the other and flatten again. Repeat this procedure a couple of times.


  • Cut the flatten dough into 3 equal pieces. Then again cut into 3 equal strips. Gently roll the strips and place 3 together and make a braid. Place the braided bread in the tins. Cover the tins with plastic film and let them rise in a warm place until the dough has almost tripled its original size.

  • Bake for approximately 20- 30 minutes in a preheated oven 180c. Remove from the oven and brush with melted butter. Remove from the tin and transfer to a wire rack to cool.


Read More..