Grated Carrot Poriyal / Stir-Fry

   Carrots,are an all time favorite for everybody.Who doesn't love it ?!!! We know that carrots are an abundant source of Vitamin A,which are good for the eyes .There's one more new information,is that  prevents in the risk of cardio vascular diseases .Also carrot has a nature to improve the quality of feeding milk of mothers.While taken in a juice format along with spinach and lemon juice,it helps in cleaning the digestive system.

  This is a simple recipe i make at my home,i think it may be helpful for those beginners.Please have a look on the way i prepare this.


Since carrots are generally sweetish in nature we add green chilies to make it bit hot....


Ingredients

Carrot (Grated) - 2 Medium size
Small onions(Chopped)- From 2 or 3 
Green Chilly(Chopped) - 1
Jeera Seeds - a pinch
Powdered Jeera - a pinch
Curry Leaves - few
Coconut(Grated)- 1 tsp
Salt - as reqd

To Temper

Oil- 1 tsp
Mustard seeds - 1/2 tsp

Method

  • Peel the outer skin of the carrots and grated them,chop the onions.Keep all the ingredients ready.In a pan add some oil,then add the mustard seeds,let them crackle.Then add the chopped onions,green chilies,curry leaves and jeera seeds.Saute them for a while.


  • Then add the grated carrots,add some salt and give a mix.Close the kadai with a lid and let it cook for 5 minutes in low flame.Water from the carrot leaves out and it gets cooked with that water.Meanwhile open the lid after 2 minutes,add the powdered jeera and give a mix,then close it.When you find the water gets absorbed and the grated carrots look separate from each other add the grated coconut.Stir for a minute,its ready now.


Its ready to be served.Accompanies rasam,poondukuzhambu,vathakuzhambu.


Read More..

Paruppu Vadai/Masala Vadai


   Paruppu or Masala vadai,an evening time snack for people in Tamil Nadu,I have say its not only Tamil Nadu, all other Southern states too.In small cities and towns around tamilnadu you can find lots of mobile eatery shops making hot hot vadai's bajji's. Like chaat's for North Indian's,its vada's and bajji's make the South Indians evenings,especially Tamil Nadu.The method of preparing this paruppu vada may vary from state to state.In Karnataka and Andhra they add dil leaves along with the ingredients it makes the vada's smell more spicier.The dill leaves add an extra fragrance to the vada's .About Kerala they prepare these paruppu vada's the same as Tamil Nadu. These paruppu vada's are kids friendly,loved by them a lot,as they belong to fried categories...


   They are prepared basically from bengal gram/chickpeas in general.Chickpeas are an excellent source of Fiber and Folic acid.And as like anyother dal's its a rich source of protein's and minerals.Chickpeas contain both soluble and insoluble fiber,which help's in controlling the cholesterol levels.I got these information's while surfing about chickpeas.


    There are different ways in preparing this vada,some may add cinnamon,garlic.Usually i used to make this vada including the above said materials.But this is something different.I got to know about this vada through my neighborhood aunty,she makes it excellent.I have tasted her vada's. Only with little ingredients she makes wonder.I got this recipe from her,and i have tried to replicate her version.If you are interested with this recipe,you can make a try.


Ingredients

Bengal Gram - 1 Cup
Big Onion (Chopped) - 1no
Green Chillies(Chopped) -1no
Dry Red Chillies - 1 or 2
Saunf - 1/2 tsp
Jeera - 1/2 tsp
Curry Leaves (Chopped)- few 
Coriander Leaves(Chopped) - few (Optional)
Salt - as reqd

Method

  • Take the bengal gram and soak in water for about 2 - 3 hours.If you want crunchy soak only for this duration,not more than that.After 2-3 hours ,drain the water in a collander.Let it completly drain for atleast 20 minutes.Meanwhile ,in a mixer add the dry red chillies and saunf,jeera and give a dry run.Then add the drained chickpeas/bengal gram.Take only about 5 to 6 Tablespoon of bengal gram at a time,i mean in batches,and grind it coarsely.

  • Once coarsely ground,take out the mixture and place in a bowl.Similarly add the remaining bengal gram and grind it.And add to the bowl.Then add the chopped onions,green chillies,and curry leaves and salt and give a mix.

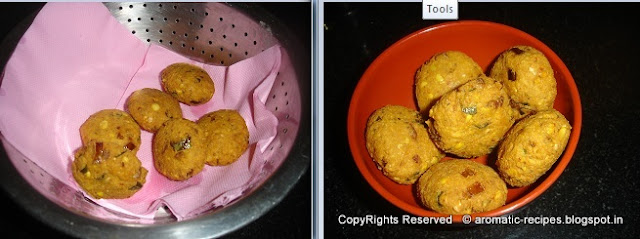
  • Ensure that the salt is evenly spread.Place a kadai,add oil let it heat.Take small balls out of the vada batter and ,roll it to the shape of a ball and gently press with your palms,its the shape of these vada's,When the oil is hot to fry the vada's ,add these shaped vada's.Fry them in Medium flame.


  •  Donot keep the flame too high,else the inner portion wont get cooked.So ensure you maintain proper temperature to get golden colored vada's.Once the vada's get their color,remove from the oil and keep them in tissue paper,to remove the excess oil.Similarly do for the remaining vada's.


  • Its ready now.You can have it as your evening snack ,serve with white coconut chutney.Also it serves as your side dish for all variety rices,morkuzhambu,and even for your ven-pongal.


This recipe goes to Vegan Thursdays...This is my first post for Vegan Thursdays hosted by Priya Suresh,i'm happy to do a post for Vegan Thursday(VT),Thanks Priya akka.


Read More..

Cony Punjabi Masala Papad

     Masala papad,is an easier and a less oily starter.It is said that this starter variety hails from the land of Punjab.No need to plan in prior to prepare this recipe.The moment you want it,you can get it.Just chopping of the onion,tomato,corainder and frying the papad's are the jobs involved in it.It's attractive multicolored topped above the papad makes it even more delightful.If you are planning to host a party at your home,try to include this as a starter,your guests,especially kids,will be more impressed.Just chop the veggies and store in your refrigerator the previous day of your party.Also you can fry the papads and store in an perfect airtight container.Its easy just garnishing will be your task.


I have tried this recipe using the papad is two ways.One is the calssic method and the other one was a cone masala papad.


This is the cone or Cony Masala Papad i did.


Ingredients


Lijjat Papad - 1 no
Onions - 1/2 no(Chopped)
Tomato - 1/2 no (Chopped)
Green Chillies - 1 no (small one)
Lemon juice - 4 to 5 drops
Red Chilli Powder - a pinch
Chat Masala - a pinch 
Corainder Leaves -finely chopped
Salt - as required


Method


  • Fry the papad and keep it ready.Place the papad on the plate to be served.The garnishing part takes here.

  • Keep ready your chopped items.


  •  Meanwhile mix all the mentioned chopped items together in a bowl.Add salt,redchilli powder,chat masala and finally add the lemon juice.


  •  Just Garnish above the fried papad. Its ready to munch now.


  • I followed these steps to make a cone from the papad. First divide the papad equally using a knife. 


  •  Take the pan you used to fry your papads,when the oil is bearable,not too hot.Dip the divided papad slowly and take it out quickly.Now it will be able to be folded.


  •  Carefully roll it the shape of a cone


  •  Using the tong hold the edges of the cone and fry them in the hot oil.


  • Now as said above for the normal masala papad ,fill the papad cone's with the chopped onion,tomato.


Tip


  • Other optional Veggies you can include to garnish this papad

           Capsicum - finely chopped 1 tsp
           Carrot -grated 1 tsp
           Beetroot - grated 1 tsp


  • Also you can add some roasted peanuts or fried cashews for rich appeal.


Read More..

Beetroot Poriyal/Stir-Fry


  Beetroot ,a dark reddish vegetable.It has such a lovable attractive color.Not only its color,it also has attractive values for our body.It contains anti-oxidants and nutrients and betaine. Betaine protects against liver diseases,diabetics and lowers the blood sugar level and maintains the blood pressure.Folic Acid,its a one more additional value present in beetroot.Folic acid,is recommended for pregnant ladies,particularly during their first trimester.Because it helps in the development of baby's spinal cord.Also Beetroot has Lycopene, a naturally occurring plant chemical,which is a powerful antioxidant helps in skin elasticity through collagen production,thereby postpones aging process occurring in the skin.The most important thing about the beetroot is ,it is a diuretic,which helps in detoxifying the system.
  Detoxification helps in throwing out the toxic substance residing in our system.So by default it purifies our body.By seeing the above good values present in beetroot.I hope you will make a try the very next time.


Ingredients

Serves 2-3


Beetroot- 1 large(Chopped)
Onion - 1 Tbsp(Chopped)
Red Chilli(Deseeded)- 1 to 2 (Broken )
Bengal gram/Channa Dal - 2 tsp(Optional)
Jeera - 1tsp
Curry Leaves - few
Grated Coconut - 1 tsp
Crushed Garlic - 2 tsp
Water - as reqd

To Temper 


Mustard Seeds - 1/2 tsp
Oil - 1 tsp 

Method

  • Peel the skin of beetroot,wash them and chop the beet's.Keep aside. In a pressure cooker/pan add oil,then add mustard seeds.Let them Splatter.Then add the bengal gram and roast it well.When it turns brown in color,then add the chopped onion .Saute for a minute.Then add the broken red chilli and curry leaves.Saute again.(It's your choice whether to chose pressure cooker or pan.I have used the pressure cooker for fast cooking.)


  • Now add the jeera seeds,you can also add it in the previous step along with red chilies.Add the chopped beetroots.Add salt ,mix well.Saute them for 2 to 3 minutes until the raw flavor goes off.Then sprinkle some water,just 3 to 4 Tablespoon.Add close the pressure cooker lid and wait for a whistle.Switch off the flame,when you get one whistle.


  •  Open the lid when the pressure subsides,and check if any water is staying back.If you find some water,just keep the cooker in flame and saute until all the water gets absorbed.Finally add the grated coconut and crushed garlic and saute for 3 - 4 minutes.Switch Off.
  • Its now ready to serve.It accompanies your dal,rasam,morkuzhambu and plain curd rice.


Read More..

Seppankizhangu/Taro Root Fry

   Seppankizhangu ,Arbi or Taro Root ,is  a root veggie.Generally not only the kids even the elders like any fried items.Instead of the usual kootu, poriyal and other fried items,this fry is different.We pressure cook the arbi ,remove the skin and head to the frying process My MIL prepares it excellently,and i learn't this recipe from her kitchen.This fry is not familiar to me until marriage,but now i love it a lot.I can even take it as an evening snack.Because the cripsy and crunchy matter in it ,brings your fingers back to the bowl for picking up more.Who doesn't love eating the fried items?

   The medicinal facts says ,it is better than potatoes.Its low Glycemic index helps the release of glucose into the  blood sugar level slowly,compared to that of potatoes which does not..Its dietary fiber content helps in easier digestion.Also has the necessary minerals and vitamins like potassium and Vitamin C,E,B and even more.The other side of this root variety is, it has oxalates,which is not good for health,so ensure you do proper boiling before proceeding with your recipes.Also keep in mind to take sufficient amount of milk or other calcium to avoid the risk of oxolate absorbtion to our system.

   I have given the step by step procedure in making this..For getting the perfect finish,remember to keep your gas flame in Medium-Low while frying,which is a prerequisite for this recipe.


Ingredients


Raw Seppankizhangu - A Handful 
Red Chili Powder - 1 tsp (Depends on your spicy level)
Salt -As Required
Water - For Boiling
Oil - For Frying

Method:

 
  • Take your Seppankizhangu in a pressure cooker.Pour some water(Tap water) and let it stand for at least 10minutes,to remove the dirt/sand.Use your fingers to remove the sand sticking to the veggie.Discard that water and wash again until the sand particles are removed.Once its done,add enough water till the seppankizhangu/arbi is completely immersed.Pressure cook for 2 Whistles,not more than that.Just 2 whistles will be enough.
 
  • Once the pressure subsides.Open the lid and pour out the steaming hot water and immediately add some cold/tap water.This helps the outer skin of the root come out well.Remove the skin.Slice the boiled root to 1/4" thickness.Keep aside and let it cool down.Let it for a while.Then in a wide kadai/pan add some oil and let it heat.Keep the flame in Medium.
 
  • Add the sliced arbi's for frying,in small batches.Keep your flame to Med-Low at this stage and the entire frying process should be done under this temperature only.Remove from the kadai when they turn golden brown and keep them in a plate covered with tissue paper.This will absorb the excess oil.Do the same for the remaining arbi's also.After frying the entire arbi's ,take a wide pan and add some oil(or add the oil which is used for frying),keep the flame low.(Mandatory). Take the salt and chilli powder,add it to the hot oil.
 
  • After adding the chilli powder,the flavor of the chilli powder pipes out.Switch off the flame.At this stage immediately add the fried arbi's and saute for a while ,to ensure the masala is entirely covered by the arbi's.
  • Its ready to serve now.Best accompanied for all rice varieties.


Tip:

  • Try to use the old Seppankizhangu/Arbi ,some young arbi's have an itchy sensation.
  • Since it takes a long time to get fried in low flame,its a lenghty process.To avoid this lengthy duration.You can boil and slice the arbi's the previous day.so you can avoid spending a long time in preparing this.


Read More..

Black Chikpeas/Konda kadalai Gravy

         Bored with the usual gravies for chappathi/roti's,so I planned to do something with the legumes.And chose the black chickpeas.Usually we prepare sundal, kuzhambu with this black chickpeas.So this time i made for my chappathi.Long time back i found this recipe in Niya's blog,didnt take a hand note of it ,so tried to replicate it by myself with a few modifications,Happy it came out well.Note it,its a semi-dry gravy. 
         Health facts about this legume family is,it has a better effect in regulating the blood fat levels including LDL and cholesterol levels.Its a good source of protein ,makes you feel full even with a half bowl.There are two types of chickpeas the white one also called as Kabuli Channa,and the other one is Black Chickpeas,which is the desi or Naatu/Naati variety.For more information about the Chickpeas please click here.The gravy we are going to see today is made with Black Chickpeas,you make it with kabuli variety too,but for this type of masala,the desi variety goes well.


Ingredients

Serves 4


Black Chickpeas - 1 Cup (Soak overnight)
Onions - 3 Tbsp (Chopped)
Tomato - 1 no (Chopped)
Coriander Powder - 3 tsp
Coriander leaves - few
Curry leaves - few
Salt,Oil,water - as reqd

For Masala


Onion - 1 small onion (roughly chopped)
Cinnamon stick - 1/2"inch(1 no)
Garlic pods- 5-6
Ginger Stick- 1" 
Saunf/Perunjeerakam- 1 tsp
Peppercorns - 1/2 tsp
Dry Red Chilly - 2 to 3 broken and deseeded
Grated Coconut - 3 Tbsp
Khus Khus - 1/2 tsp


To Temper


Oil- 1 tsp
Mustard Seeds - 1/2 tsp


Method


  • First and foremost,pressure cook the soaked chickpeas for 2 whistles.Drain the water and keep aside the chickpeas in a seperate bowl.Dont discard the water.You could use the cooked water in this recipe instead of plain water.In a pan add some oil and saute the ingredients(except coconut and khus khus) ,for 3-4 minutes,or until the raw smell of ginger and onion has gone off.Then add the coconut and khus khus

  • Saute well for 4 minutes,Switch off the flame..Let it cool down.Once cooled grind it in your mixer to a smooth paste.Keep aside.In another/same pan add some oil and splatter the mustard seeds

  • Add the chopped onions and curry leaves,saute until onion turns transparent,add the chopped tomato saute for awhile.Then add the ground masala paste.


  • Saute again for awhile,this is done to remove the leftover raw flavor sticking in the masala paste.Finally add our main ingredient,Black Chickpeas mix well with the paste.Add some water,may be 1/4 Cup.Give it a mix.Close the pan with a lid and cook for 5 -7 minutes.Switch off the flame once the water is absorbed well.


  •  Serve with garnished coriander leaves.


Tip

  •  For fast cooking ,you could avoid pressure cooking the chickpeas and do the rest cooking process(except for preparing the masala) in your cooker and add the soaked channa (unboiled) and give it a 2-3 whistles.You could save at least 15 minutes by this method.
Read More..

MaaLaadu

       Planning for a healthier,easier and a simple evening snack for your kids.No worries,the snack we are going to prepare today satisfies the above said,healthier,easier and simpler.By simpler,we mean ,we needn't rush to our grocery shop to purchase  the required ingredients. We are going to use the  ingredients  within  our   kitchen boundary.The main ingredient is roasted gram,it has proteins,carohydrates,dietery fiber,potassium,sodium,calcium,iron,magnesium,riboflavin,niacin,phosphorus,thiamin and zinc.
        This is a very familiar recipe/evening snack of Tirunelveli ,region in southern Tamilnadu.They used to call it as Maa Laadu(,not as Ladoo).


Ingredients


Makes 10-12 balls


Roasted Gram - 1 Cup
Sugar - 1/2 Cup
Cardamom Pods - 1 or 2
Ghee - 1/3 Cup
Cashes - few(broken)


Method


  • In a mixer add the roasted gram,cardamom pods and sugar ,grind it to smooth flour.Transfer the contents to a wide vessel.


  • In a small pan add a teaspoon of ghee,heat it and add the broken cashews and fry till golden yellow color.Add the fried cashews to the grind flour..In the same pan,keeping in low flame,add the remaining ghee and let it heat.Let the solid ghee dissolve,and look like an oil like appearance. No need to overheat it beyond this level.Switch Off the stove.


  • Add the heated ghee to the flour mixture little by little alternating with a gentle mix using a spatula or a spoon.Do not use your hands to mix the flour with hot ghee.


  • When all the ghee is added to the mixture(reserve a 1-2 Tbsp ghee to ensure not to add over ghee to it).At this stage the flour may look like this pic in middle.Gently mix with your hands,ensure you can handle the temperature or not.Make small balls out of the dough.


  • Store the balls/maa laadu in an air-tight container.


Tip


  • In this recipe i have used whole roasted gram,it tastes better compared to broken roasted gram.So if you want to make a try ,my suggestion would be,to use the whole ones.
  • Sugar Measurement i have given for this recipe is bit sweeter,next time i would try to reduce to 2 Tbsp of sugar amount,people with sweet-tooth can go ahead with the above mentioned measurement of sugar itself.
Read More..

Wheat Rava Upma/Khicidi

      
          Wheat ,in my previous post i have mentioned some health values about it.Wheat is a good source of minerals like manganese,magnesium and selenium,phosphorus,zinc,iron ,potassium and copper. However,Calcium is found  in small quantities in wheat.Wheat acts as a good laxative.Not only minerals also vitamins like B6, niacin, thiamin, folate, riboflavin ,Vitamin E and K are present in minimum level.Though it contains all the above vitamins and minerals that help our body,the good thing is it's a low calorie food.
          Wheat also controls diabetes and cholestrol.Not only these benefits we may get through it ,still there's a lot more to know.It will go into an elaborate post,so i wish to stop here.Coming to the recipe,wheat rava upma/khicidi,whole wheat grains are broken down into small granules.The size of the granules may vary.some people also use it as a replacement for rice,they cook the wheat rava and have it with their meals (instead of rice)accompanying sambar,curd rice.unlike the ordinary white rava ,we don't need to roast it before use,we can simply  add it to the recipe.Instead of the usual upma,this recipe is slightly a varied one from upma category.


Ingredients


Serves 2-3


Wheat rava - 1cup
Mixed Veggies -Given Below
Onion - 1 no 
Tomato - 1 no(chopped)
Ginger Garlic paste - 1.5 tsp
Green Chily - 1 no(slit)
Turmeric Powder - 1/4 tsp
Coriander Powder - 1 tsp
Chilli Powder - 1 tsp
Water - 3 Cup
Pudhina& Coriander Leaves - few
Salt - as reqd
Oil - as reqd 

Mixed veggies: 

Totally measuring 1 Cup Volume
Carrot -1 no 
Beans - 4 no
Babycorn - 2 no(Optional)
Capsicum - 1 no

To Temper


Oil - 1 tsp
Mustard seeds - 1/4 tsp

Method

  • Keep the ingredients ready.Cut the onions lengthwise/chop it.Here i have cut the onions length-wise.In a pressure cooker add oil,add mustard,let them splutter.Then add the onions,green chilly.Saute them for a while or until the onions turn transparent.Later add the chopped tomatoes,saute them well for 2 - 3 minutes.
  • Add the mixed veggies and saute for a while ,until the raw smell goes off.Keep the flame -Medium.Add the ginger-garlic paste and saute for 3-4 minutes under medium flame.Then add the turmeric,chilli,coriander powders and salt and cook for 3 minutes.


  • Add the 3 cups water and let it boil.Add the chopped coriander and pudhina leaves.Reserve a few for final mixing.When the water starts bubbling around the edges,add the wheat rava slowly.Give it a mix with the ladle.Close the cooker lid and wait for 3 whistles.


  • When the pressure has settled down open the lid .Add the reserved coriander-pudhina leaves and mix gently allover.At this stage if you wish ,you can add 2 tsp of gingelly oil.Which gives a non-sticky appearance.


  • Serve hot with coconut chutney.


Read More..