Dates and Nut Roll


Are you looking for a sugarfree sweet this diwali?.Then this would be the perfect choice.Recently i purchased chef Sanjeev kapoor's book and found this interesting sweet,and started to give my try.This is an easy and interesting sweet to make.The good thing about this is we are not adding sugar ,which the date and fig's will give you a sugary taste.Also loaded with all nuts its a healthy one to make.You could use your choice of nuts like cashews,raisins,and even pumpkin seeds,but ensure that you are adding more dates compare to nuts.Dates is the binding agent here.Lets look into the recipe


Ingredients

Dates - 2 Cup (chopped)
Figs - 1 Cup (chopped)
Almond - 1/2 Cup (chopped)
Walnut - 1/2 Cup (chopped)
Pista - 1/2 Cup (chopped)
Edible Gum - 1.5 Tbsp
Poppy Seeds - 3 Tbsp
Ghee - 2 Tbsp

Method

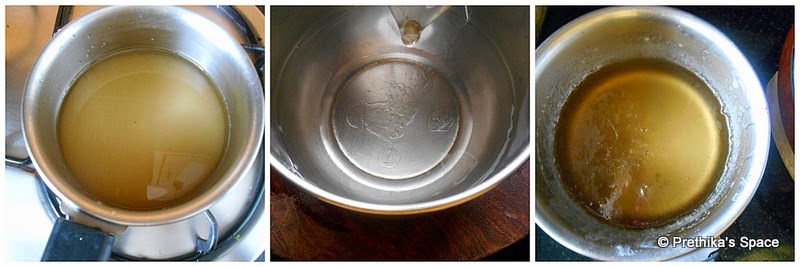
  • In a pan add a tsp of ghee and fry the edible gum.Fry them until they are puffed,as shown in the picture and keep aside to powder them in a mixer .to a fine powder and keep aside.


  • Chop the dates,figs and the other nuts.Now in a mixer powder the edible gum and keep separately. 


  • In the same mixer coarsely grind the dates and figs separately(If you have food processor chop dates and figs using them) and keep aside. In the same kadai which was used to fry the gum add the remaining ghee and heat.


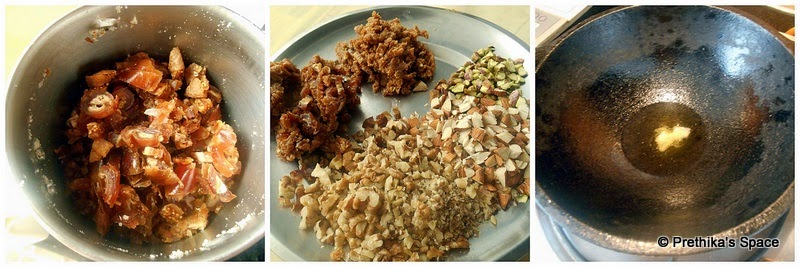
  • Add the chopped nuts,then the dates and figs .Add the powdered gum and mix them under heat for a minute


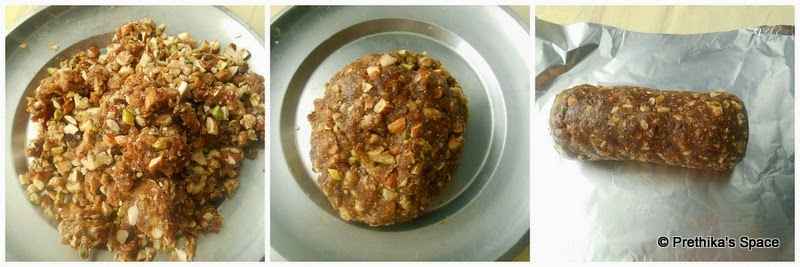
  • Transfer the mixture to a wide plate and allow to cool.Knead the mixture with your hands and form a ball.And gently make the ball to a roll of 2.5" width.Place a foil below the roll to cover.


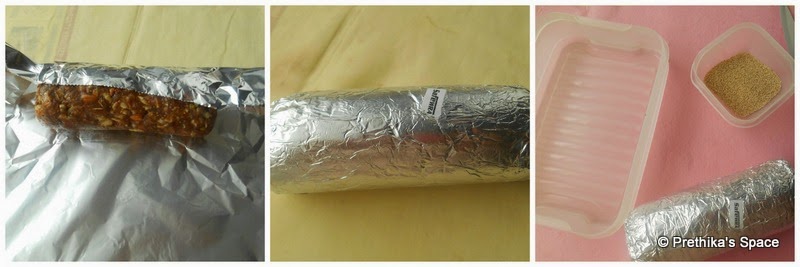
  • Wrap the roll covering the sides.Once wrapped, with the help of both hands mildly roll the date roll in a table and make them even allover.Place them in refrigerator and wait for an hour.After an hour take the roll out of your refrigerator ,keep a knife ,poppy seeds and a box ready.


  • Remove and unwrap the foil carefully bring out the roll.With the help of a knife cut the roll of 1/2" thickness each.(After cutting the date roll i shaped them again to a perfect round shape)Dip the roll in the poppy seeds and cover allover the edge's and place them in a box.


Its ready to serve.


Read More..

Sweet Aloo Mixture

I have tasted this sweet aloo mixture in Adyar Ananda Bhavan ,and tried to recreate this mixture which came out to be a success in my first attempt.Its simple to make provided you have a readymade aloo mash to lighten the process.I had a huge stock of aloo mash at my home and gave it a try using them.It was good and less messy when compared to the fresh preparation,where it needs potatoes to be boiled and finely mashed.If you find the aloo mash in stores you could give a try using my method.I found this mixture to be heavy and filling one,as it contains aloo starch and nuts.But for a special occasion it gives a rich appeal.


Ingredients

Aloo Mash (Readymade) - 1 Cup
Rice Flour - 1/2 Cup
Sugar(powdered) - 1/4 Cup (Can increase/decrease according to your taste bud)
Nuts and raisins- less than 1/4 Cup (I used badam,cashew and raisins)
Water - as needed
Salt - a pinch
Ghee- 1 tsp
Oil - for frying

Method:


  • In a vessel add the aloo mash and add some water,leave it for a minute and work on the aloo mash to form a dough.Then add rice flour,salt and make a soft dough out of it,sprinkle water if needed while forming the dough.Do not add water all at once. Meanwhile heat oil in a frying pan.Using the dough press take a small amount of dough and fry them.


  • Fry the aloo sev in a medium flame.Turn the sides and fry them.Once done remove it from the oil and place them in a tissue paper to drain out the excess oil.Repeat this for the remaining dough.


  • In a mixer grind the sugar to a fine powder and keep aside.In a kadai add oil or ghee roast the cashews.


  • In the same kadai roast the badam and raisins and keep it along with cashews.In a separate vessel add the fried aloo sev ,roasted nuts mix well.


  • Add the powdered sugar and mix well.


  • Transfer to an airtight container.


Read More..

Thinai Vennai Murukku / Foxtail Millet Butter Murukku


Are you looking for something healthy and a traditional recipe ? If yes,then you are on the right track.Yes today my post is going to be a simple twist in the regular murukku.In the regular murukku flour we add rice flour,here iam going to replace the rice flour with homemade thinai/foxtail millet flour.Eventhough there is not going to be a much variation in taste compared to the regular rice flour one's,but you will get a satisfaction of consuming something even more healthier ,since foxtail millet is said to be a good source of protein,minerals an iron.Also it has a good quantity of betacarotene compared to rice and wheat.So why not give a try with a healthy millet?


This murukku came out so crispier and tastier.The flour is yellowish by nature so by default this murukku came out in golden color.


Ingredients


Thinai Flour - 1 Cup  (Click Here for Homemade flour version )
Urad dal - 3 Tbsp
Jeera Seeds - 1/2 tsp
Hing - a pinch
Butter - 1Tbsp (softened)
Salt - as needed
Water - as needed
Oil - for frying


Method


  • In a vessel add the thinai and urad flour,salt ,hing ,softened butter and jeera seeds.Mix well with your fingers so that the butter is incorporated well with the flour.


  • Add water little by little to make a dough.The dough should be soft and loose.Meanwhile heat oil in a frying pan.Take out a small portion of the dough and fill it in the murukku press.


  • For convenience you can make murukku's on back of a ladle .If you can manage the heat you can simply shape out the murukku's directly in frying oil.Flip the sides of the murukkus to get fried in the other side too.Take out once fried or golden in color.Keep the flame in medium only.Do not keep it either in low or high flame.


  • Store the murukku's in airtight container once it's cooled down.Its shelf life time is upto 3 weeks.

Read More..

How to Make your own Thinai and Rice Murukku Maavu / Flour


During diwali almost most of them would make murukku/chakli at home.Some people would make this snack using the store brought flour,as making your own flour at home would be little bit time consuming.But anyways homemade's are best at anytime.Until my last preparation of murukku was with the store brought flour,but i got excited to make my own flour when my mom visited my place and she said about the thinai murukku which would taste better.Since i couldn't find any foxtail millet/thinai flour around my place.I have to get in to the process of preparing it myself.It is so easy to enroll yourself ,and the tedious thing for me was to get it ground in flour mill.But once the four is ready and you taste the snack you can figure out the mean difference between the store bought and healthy hygienic home made one's.


Its not only you could make this only for murukku ,you could also make idiyappam and puttu out of this flour,i have tried with the rice flour puttu and idiyappam which came out to be good.And thinai puttu also was excellent.Just take your time to make this homemade flour and enjoy your festive snacks.


I have given both the rice and thinai/foxtail millet flour making below.

Ingredients


  • Thinai / Foxtail Millet - 7 Cup (you can take as much as you have)

OR


  • Idli Rice - 1 Cup
  • Raw Rice - 4 Cup (You can add omit Idli rice if only using for snack making-For multpurpose use like Idiyappam/Puttu and snack you can add Idli Rice)


  • Urad dal - 5 Cup (Apart from snack making i use this urad  flour for making urad ladoos. )

Method:


Method for making Thinai and Rice Flour:

  • In a wide vessel add the thinai and wash it until the dirt is removed and soak it in enough maount of water for atleast 2 hours.To check for the millet is soaked enough,you can take some soaked millet and munch it, if you are able to chew the millet easily its done.,else allow to soak for another 1/2 hour.Then drain the water completely.


For Thinai

For Rice


  • In a wide plate or tambalam spread a clean white cloth and spread the millet evenly across the plate and place it under sun for drying.If yu donot have a wide plate dont worry ,Take a mat and place the white cloth above the mat and spread the soaked and drained millet and dry it under sun.With the help of your fingers make lines around the millet ,to help the millets dry faster.

For Thinai

For Rice


Keep checking the millets/rice at some intervals.If you take a handful of millets/rice it should be completely dried ,thats the phase where you have to proceed for the next process in making the flour.Collect the dried millets and process them in the flour mill and get it fine powdered.Once the flour is ready ,spread the flour in a wide plate and allow it to cool .If you omit this step then the flour would tend to form lumps.Allow it to cool inside the room for atleast 1hour and then store the cooled flour in an airtight container.

Thinai and Rice flour after ground:


Method for making the urad flour:

Take the requird amount of urad dal and dry roast it.No need to roast it until golden brown.Switch of the flame once you get the aroma of urad dal.Allow it to cool and grind them in flour mil.Once the flour is done ,as said for the millet/rice flour above,spread the ground flour inside the room and store it after cooled down.

Urad Flour after ground:


Read More..

Thattai / Nipattu


Diwali around the corner,after this pooja functions the process of making sweets and savories would gear up everywhere.There are lot of savories that capture the diwali season and one among them is thattai or nippatu.Nippatu is the name called around karnataka and also even around dharmapuri region,which belongs to Tamilnadu.But apart these places it's called as thattai within Tamilnadu.Thattai ,a  mild spicy savory is made with gram dal,rice and roasted dal.There are lots of varieties in making this.This is the one of the most tasty and honestly perfect savory.Its one of my favorite.During each diwali season my mother had never missed to make this wonderful savory.Its a little bit time consuming effort,by the result will be absolutely delicious.


This is my basic version which we usually make at home.For variations you could add broken peanuts also for even more crispness and also til seeds also.Make this healthy homemade snack at home and enjoy your festival.Am giving a small portion amount which yields about 12 to 18 thattai.You could double the quantity as per your need.


Ingredients

Yields - 12 to 18


Idli Rice - 1 Cup (Soaked for 2 hour)
Roatsed gram dal (powdered finely) - 3/4Cup (it may require more or less depending upon water in the batter)
Channa dal- 1 Tbsp (Soaked in water for 1 hour)
Red Chilly - 2 no's
Curry Leaves - few
Coconut slices - 1 Tbsp
Hing / Asafoetedia - 1/4 tsp
Salt - as needed
Oil - for frying


Method


  • Soak the idli rice and channa dal in water for 2 hours and 1 hour respectively.After 2hours drain the rice from water and grind them along with red chillies and salt.Add little water and grind.Do not add water all at once.And keep aside the ground batter.


  • Transfer the rice batter to a bowl.Add the soaked and drained channa dal.Add the sliced coconut bits,hing and curry leaves.Mix well And the add half the portion of gram dal powder and see that you get a soft dough.If needed you could even more dal powder.


  • The dough consistency should be neither too hard nor to loose.Keep the dough ready.Take a polythene sheet.Keep some oil nearby.Apply oil to the polythene sheet.


  • Heat oil in a pan aside.Take a small pinch from the dough ,make it a ball and keep it on the polythene sheet ,apply your fingers with little oil and make small disc shaped thattai out of it.Dip your fingers with oil and mildly tap it around to get the shape.You can 4 to 5 such small thattai in a single sheet.And once the oil is hot enough.(To check the oil temperature put a small dough it should pop up immediately after adding it to the oil) gently flip the thattai one by one and fry them.


  • Turn the other side of the thattai once the one side is well cooked.Keep the flame in medium high.Once done transfer the thattai to a bowl and store them in an airtight container when its cooled down.


Notes

  • You could use mixer or grinder for making the rice batter.Grinder would be a better option.


  • In the middle of grinding process,check to the spiciness of the chilli in the batter.If you need more spicy add 1 or 2 chillies to the grinding batter.Salt is added for this purpose to find the correct spiciness.Without salt you could not judge the correct amount of spiciness.


  • To make the roasted dal powder take the required amount of dal and grind in mixer.The dal should be finely done.Then sift the dal and keep aside.


  • Once the dough is ready check to the salt and spiciness.These both should be little more extra in final dough,because the frying process will minimize the salt and spice.

  • This stays good for more than 2 weeks.
Read More..

Mushroom Biriyani


What's gonna be a better way to start your weekend,without a special lunch menu.?!!! No ways isn't it ?And ofcourse no weekends will get fulfilled without a special food.Agree !!! Here's my post which would make your weekend or your special day even more special.Nowadays across India Biriyani's are a mass hit.Be it a simple birthday party or a grand marriage occasion,biriyani will definitely occupy the menu.There are lots of varieties in biriyani,from veg to non-veg and from state to state there are variations in making them.But whatever might be any biriyani is simply awesome to me.Its a comforting food for sure,just a biriyani with a raita would make fulfilling combo.I present here a tasty mushroom biriyani and its my simple method to make this biriyani.To make this biriyani even more rich i add cashew paste and saffron milk too,but my today's post will follow a simple method..


Make this yummy biriyani and make your meal special.


Ingredients


Serves - 3


Mushroom - A handful
Onion - 1 big
Tomato - 1 big
Ginger garlic paste - 2 tsp
Lime juice - 1/2 tsp
Pudhina/Mint Leaves - few
Coriander Leaves - few
Green Chillies - 3 no's
Yogurt - 2Tbsp
Turmeric powder - 1/4 tsp
Red Chilly Powder - 1.5 tsp
Garam Masala - 1/2 tsp
Bread slices - 4 no's (optional)
Zeera Samba Rice - 1.5 Cup
Water - as needed
Salt - as needed
Oil - as needed
Ghee - 2 tsp

Spices 


Bay Leaf - 2 no's (small)
Cinnamon - 3 sticks (1")
Cardamom - 2 no's
Cloves - 2 no's
Star anise - 1 petal 

Method

  • Chop the tomatoes,slice the onions,slit 2 green chillies (from the 3no's),Clean the pudhina and coriander leaves.clean and slice the mushrooms.Keep the ginger garlic paste ready.In a mixer add few pudhina and coriander leaves and 1 green chilly(my chilly was too hot so i took 1no) and grind them without adding water,keep aside.Wash and keep the rice separately.In a pressure cooker add oil and add the spices when the oil is heat enough.Saute until the spices flavor arise.


  • Add sliced onions and saute until the onions turns golden brown.Add the ginger garlic paste and saute for awhile.Then add the pudhina-coriander paste and saute again.

  • Add the chopped tomatoes and saute until the tomatoes are well cooked.To cook the tomatoes fast add some salt.Then add mushrooms and saute again.Wait until the mushroom leaves the water from it and when the water gets evaporated add the red chilly and turmeric powder.Add salt.

  • Add the yogurt and mix well and saute until the oil leaves from it.Then add the water for 1 cup add 3cup water,If adding basmati add 2 cup for 1 cup rice.Allow the water to boil.Add the soaked rice and mix well.Check for the salt and spice now.You can add salt or spice at this time if its not sufficient.Allow to cook in open ,without placing the cooker lid.

  • Cook until the rice is 3/4th cooked and the water is almost absorbed.Spread few pudhina laeaves and garam masala and the ghee and mix well.Close the cooker with the lid.Cook for 7 to 10 minutes under low flame.After 10 minutes remove the lid and mix the biriyani with the ladle.If you wish to finish off the process you can stop at this stage.If you wish to add bread slices you can proceed the next step.

  • Take the bread slices and cut the corners and cut them in cubes and saute them in a pan with ghee.Add the fried bread to the biriyani when its hot enough.

  • Serve with onion raitha and any gravy.
Read More..

Paal Bun / Jeera Bun


This is a very peculiar and not usually found in many sweet shops.Only few shops would make this ,and too, it would get sold in minutes.Its rarely found in city shops,in truth i haven't ever seen this major cities,but in village surrounded places you could find this bun very frequently.Just like donuts they are fried in oil and dipped in sugar syrup.This bun is so airy inside ,with a crystallized sugar coating outside.Just a one bite will never let you stop asking for one more.I have tasted this bun at my native place and to say, am a die hard fan for this paal bun.I have tried many times to recreate this recipe at my home but each time either the dough mixing will go wrong or my sugar syrup will go bad,after many attempts am finally up with this recipe and am so happy to make this recipe a success at last.


Also called as jeera bun in some places,where jeera is the sugar syrup.This bun is so soft and airy you could find this in the below pic.


Ingredients


Maida - 1 1/4 Cup
Fresh Curd - 1/8 Cup
Water - 1/8 Cup
Sugar - 1/8 Cup
Baking soda - 1/4 tsp
Salt - a pinch
Refined oil - 3 Tbsp + for frying

For Sugar Syrup 


Sugar - 2Cups
Water - 3/4 Cup

Method


  • In a mixer add sugar and curd,mix it until the sugar gets dissolved and keep aside.In a vessel add curd-sugar,baking soda and,salt,water and mix well.Leave the mixture for atleast 15 minutes,you can find a frothy layer on top.Add the half of the oil and mix well and add the maida little by little and form a dough.


  • If you find the dough to be too sticky add little amount of maida.The final dough should be loose and sticky.Finally add the remaining oil and cover the dough with a lid and leave aside for atleast 7 hours.Alternatively you could leave the dough overnight also.


  • The next day you can start with making sugar syrup.Take the required sugar and water in a pan and boil for 5 to minutes or until you get a string consistency.You can check this by touching the sugar syrup between your index finger and thumb finger ,you can find a string/thread like structure,by that time you can switch off the flame and allow your sugar syrup to cool.Alternatively ,you can also check this without harming your fingers by taking a bowl filled with water.Then with the help of a spoon drip the syrup into the bowl if you find the syrup settling at the bottom of the bowl then its ready.You could see my syrup which has started forming crystals when it is getting cooled down.


  • Take the dough,knead the dough by adding a tsp of oil and divide the dough into equal sized balls and with the help of the chapathi rolling pin,for small disc out of the balls with 1/8" thickness.Or just the thickness of a puri could do.


  • In a pan add oil and heat it.Fry the small puri's in oil by turning it sides.And dip the fried buns in sugar syrup for 5 to 10 seconds only.Repeat to all the buns and keep them aside.You might see the sugar crystals on top the buns.


  • Its ready to serve now.


Note

  • Depending upon the flour it may require more or less quantity of maida while forming the dough,so try to keep atleast 1/2 cup of flour reserve.
  • Once done try to consume it on the same day.
Read More..